Thursday, November 7, 2013

Apple Caramel Cupcakes


Fall is apple picking season.
Going apple picking doesn't mean taking home five apples, no it means taking home a ton of apples you could never eat yourself. That's the same with every fruit picking. But it's also the definition of it. I mean, why would you go apple picking and only take home the amount you would get at a store? When you enter the orchard and see all the trees standing in rows, only waiting for you to take there fruits, it is your chance to do exactly that.


After a couple of hours, eating and picking apples (the eating part is also an important one) I had a whole lot of apples to take home with me. They looked beautiful, with some having leaves still on their stems, red-cheeked, like Snow White's apple she got from the evil which and still glooming from all the sun, which made them ripe.
This almost sound like a poem about apples in an orchard....


So the only rational idea about using up all those apples is baking apple-ishious things.
Number 1: Apple Caramel Cupcakes


Yes, apple and caramel together makes me happy. I am a huge fan of caramel so this is totally one of my favorite recipes. While making the dough it leaves you wonder, if the cupcake will actually taste like caramel, but I can soothe you: the caramel taste is unbelievable. And the frosting gives everything the final touch for perfection.


Apple Caramel Cupcakes 

serves 24 cupcakes 

Ingredients:

For the Cupcakes:
2 1/2 cups flour (240g)
4 teaspoons baking powder
1 teaspoon ground cinnamon
1 teaspoon salt
4 eggs, at room temperature
1 cup packed light brown sugar (220g)
1 cup granulated sugar (200g)
1 cup vegetable oil (220g)
4 teaspoons pure vanilla extract
4 apples (about 1 pound), peeled and shredded - I used two Golden Delicious and two Granny Smith, you can really use whatever you want. Plus 1 extra apple if you are going to garnish 

For the Caramel Sauce:
8 tbsp. unsalted butter, cut into pieces (110g)
1 cup brown sugar (220g)
1 cup heavy cream (230g)
¼ tsp. vanilla extract
Pinch of salt

For the Buttercream Frosting:
16 tbsp. unsalted butter, at room temperature (230g)
1 lb. confectioners’ sugar (450g)
1½ tsp. vanilla extract
1/3 cup caramel sauce
Pinch of coarse salt
2 tbsp. heavy cream


Directions:

Preheat to 350° and line 2 cupcake pans with baking liners. In a large bowl, whisk together the flour, baking powder, cinnamon and salt. In a medium bowl, whisk together the eggs, brown sugar and granulated sugar until smooth. Whisk in the oil and vanilla. Stir into the flour mixture until just combined; stir in the apples. Spoon the batter into the pans until almost full. Bake until golden and a toothpick inserted in the center comes out dry, 25 to 30 minutes. Transfer to a rack to cool completely.

To make the caramel sauce, melt the butter in a heavy-bottomed saucepan over medium heat. Add the sugar and cook, stirring occasionally, until the sugar begins to foam a bit. It will look and smell like it’s on the verge of burning. Remove from the heat and add the heavy cream. Stir until the sauce is smooth (you may need to return it to the heat to smooth it out), then mix in the vanilla and salt. Let cool.

To make the frosting, add the butter to the bowl of an electric mixer. Beat on medium-high speed 1 minute until smooth. Blend in the confectioners’ sugar until smooth, 1-2 minutes. Mix in the vanilla, caramel sauce and salt until incorporated. (Note: the caramel sauce should be just warm enough that it is workable, but not warm enough to melt the butter in the frosting.) Add the heavy cream and whip on high speed until light and fluffy, about 3-4 minutes.

Decorate the cupcakes as you'd like, I piped the caramel butter cream, added the apple slices and drizzled the rest of the caramel sauce over.


Wednesday, October 23, 2013

Pear Cornmeal Pound Cake


We all have a caring, loving and probably sometimes a little crazy mother. I do really love and appreciate mine, but there are times where I just could smile at and hug her because nobody else, or maybe in this case some, would do things like that.
Ok, let me tell you: It was on a nice Sunday and I had bought ingredients for a pretty extravagant and long lasting baking afternoon, including one single cake. I started baking, messing up and mistaking but after some really nice hours in our kitchen I had created a monstrously tasting and looking mix-every-sweet-treat-you-love together cake. It was a little too much mixing in the end, so this recipe won't end up on this blog.
While waiting for that first cake to thicken and to chill, my mother came every ten minutes into the kitchen and asked wether it is already time eating my Sunday afternoon activity. Sadly I had to tell her that she probably would have to wait until the next day, because the thickening process took way longer than expected.


The next thing I heard was a desperately sounding voice reaching my ears: "I was looking forward to your cake the whole day. I even kept myself from making one today. If I can't try this one today you will actually see me stealing a piece."


What was I supposed to do after those words? It was absolutely impossible for me to ruin the cake by eating it at this moment in this undone state. So the only possibility to make my mom happy again, was baking another cake. The only problem: It was Sunday night, we didn't have that many more ingredients for an emergency cake at home and I still had school work to do. There simply was no way leading around baking a second cake. So I searched the pantry for edible contents and came up with a simple but delicious pear cornmeal pound cake.
It was actually that good, I brought a second one into class a couple of days later.

Pear Cornmeal Pound Cake

serves 1 9x5-inch loaf

Ingredients:
1/2 cup plus 2 tablespoons cornmeal (90g)
1 cup all-purpose flour (130g)
1/2 teaspoon baking powder
1/2 teaspoon salt
8 tablespoons (1 stick) unsalted butter, softened (110g)
1/2 cup granulated sugar plus 2 teaspoons, divided (100g)
3 large eggs, room temperature
1 teaspoon vanilla extract
1/2 cup yogurt (120g)
2 ripe pears, chopped


Directions:
Preheat the oven to 350 degrees F. Grease bottom and sides of one 9 x 5-inch loaf pan; dust with flour, tapping out excess.
In a medium bowl, whisk together cornmeal, flour, baking powder, and salt; set aside.
In the bowl of a stand mixer fitted with a paddle attachment, cream the butter and 1 cup of sugar at medium speed until light and fluffy, about 2 minutes. Scrape down the sides of the bowl with a rubber spatula as needed. Add the eggs, one at a time until just incorporated. Add the vanilla and yogurt; beat at medium speed until combined, about 30 seconds. Add the dry ingredients and beat at low speed until just combined, about 30 seconds, scraping down the bowl as needed. Fold in 1 1/2 pears.
Scrape batter into prepared pan and smooth surface with a spatula. Slice the remaining half pear into ¼-inch-thick slices. Place pear slices straight down the center of the loaf. Sprinkle loaf with remaining 2 teaspoons of granulated sugar.
Bake in preheated oven 55-60 minutes until golden brown or toothpick inserted into the middle comes out clean. Cool bread in pan on wire rack 15 minutes, then remove loaf from pan and cool completely on wire rack.

Adapted from Sweet Pea's Kitchen


Tuesday, October 15, 2013

Basel, Switzerland


What do you think of when someone tells you about Switzerland?
I am sure chocolate, cheese and the Alps are in your list. But honestly, Switzerland is so much more. I have visited Basel for a couple of days recently and I love it.
Now, that I finally uploaded all my pictures I want to share some special Swiss food with you:

1. Gilgen Bakery


This is one of the smallest and cutes bakeries I have ever seen. But it is fascinating how many cakes and pastries the little shop holds. There is no way of passing the store without noticing, which they made sure of with leaving the door open and letting the fragrance fill the whole street.


Once you are in there you can get any traditional pastry you would like. From plum pies to Linzertortes and Crumb cakes. And the ladies working there will take it right from the display window, because everything is made that same day.


2. Book presentation and vegan buffet


During my stay I also went to a presentation about a book, containing drawings and poems. The author is a Swiss environmental activist, walks around the whole world and makes people aware of reusable energy and sustainability. The past year he started drawing and writing poems to each of his pictures. Because of his various trips he knows a lot of people from all different parts of the world and I was meeting people from Europe, America and Africa. It was great.


After he talked about his book and how it came to become a book, there was a buffet set up with a lot of vegan crackers, fruits, sandwiches and at least eight cakes. The crackers were garnished with different vegetable or nut spreads and really good. I could have eating the whole buffet, if there weren't other guests. He made everything himself the same day and the decorating was with the best fall ornaments and flowers you can think of. So this definitely was a great event to go to. 


3. Typical Swiss dessert (Vermicell) 

There is this one dessert, which I could eat every day. Since I have been a little girl this is on my top ranked dessert list. I have to admit not everyone likes it, it is made of chestnuts and comes with whipped cream. Until now they are only sold in Switzerland so this is the must have when I visit. Translated into English means Vermicelles little worms. And you can imagine as a little girl I was thrilled about saying: "Look mom, I am eating worms!" 


4. Mövenpick ice cream


Probably the most famous ice cream is Mövenpick. They don't only have ice cream places and restaurants, they also have first class hotels. But I am sure everything they do is first class. Sadly it was raining a whole day, so I found an open door at the Mövenpick restaurant. It was packed! I really had a hard time finding a free table. Finally there was a nice waitress showing me a free table with the ice cream menu right in the middle. How did they know? So I looked through the noble book and found the one ice cream made for me: Caramelita. One scoop Caramel and one scoop Maple Walnut, garnished with whipped cream, caramelized nuts and caramel sauce. 


5. Tibits - A vegetarian restaurant


Vegetarian restaurants are becoming more and more popular. I don't exactly know why. Maybe it's because people want to eat healthy or there are just more vegetarians those days. Or simply because there are so many delicious things you can choose from. Tibits is a place where this is the case! 


You take a tray and a plate in the beginning, you go around the buffet once, twice, maybe three times until you start putting food on your plate because you can't decide on which looks the best and is absolutely worth taking and then you look for a nice table and enjoy. 

This is my perfect plate

I obviously liked it a lot ;)

Thursday, October 3, 2013

Fudgy Chocolate Tarts


Just look at those creamy tartlets. Their richness can't be topped by any other chocolate dessert. I mean, this is consisting of almost pure chocolate and six other ingredients.
Those nutritious little sweets are raw and gluten free. But honestly, you won't think of that when you only take one bite. Because after one single bite you think there is nothing more exciting in this world. The combination between the chocolate and the faint tasting of the maple syrup in both the crust and the filling is making this dessert a little mysteriously.


I made those goodies for my friend's birthday and it took me a long long time, until I got the notification of them being all gone. And normally this is not something I have to wait for long.

I secretly stole a tartlet from her pile to taste - come on, I don't want to give her something tasting bad- so I can say for sure, it takes a couple of starts to finish it.
But as filling they may be, it is almost a magical moment when this moist chocolate filling arrives your mouth and tongue. All the melted chocolate moments of your life combine in this one single spoon. And it is worth it.


Fugdy Chocolate Tarts
(Serves 4-3" tarts or 18 small tartlets)

Ingredients:

Crust

1 1/2 cups almond meal (finely ground)
 (145g)
6 tablespoons dark cocoa powder (such as green and blacks)

3 tablespoons maple syrup

3 tablespoons coconut oil

1/2 teaspoon sea salt

Filling
8 ounces bittersweet chocolate, finely chopped (230g)
3/4 cups heavy cream (170g)
1/3 cup maple syrup (110g)

Directions:

Pour all of crust ingredients into the bowl of a food processor.
Process until all ingredients are blended.
Divide crust into four servings and press crust in the bottom and up sides of oiled tartelette pans.
For the filling place the chocolate in a bowl of a stand mixer (the bowl must be heatproof!); set aside.
Whisk together the cream and hones and bring to a boil over medium heat.
Pour the cream mixture over the reserved chocolate and whisk until melted and smooth. Refrigerate uncovered, stirring occasionally, until cooled to room temperature, about 45 minutes to 1 hour.
Place the bowl on a stand mixer and fit the mixer with a paddle attachment. Beat on high speed until the chocolate mixture is lighter in color and fluffy in texture, about 1 minute. Immediately pour into tarts, the whipped fudge filling will harden and be difficult to spread as it sits.

Adapted from Deliciously Organic


Wednesday, September 25, 2013

Cappuccino Muffins


I don't like Cappuccino, nor Espresso, nor Latte Macchiato... Simply I don't like coffee.
Now you are wondering why in the world is she making Cappuccino Muffins then? I'll tell you why: there are other people who desperately reach for any type of coffee. I am sure you know at least one person of that kind. Those people feel the deep desire of coffee as soon as they get up and it won't stop until there is almost as much coffee as blood in their veins.


The person I can contribute the the coffee-addicts is my mother. And she is the one I made those muffins for.
Somehow she became my dose of coffee-love. There is no other explanation why there is absolutely no sympathy between coffee and my taste buds.


Back to the muffins, they are not only consisting of coffee but also of little chocolate chips, who cooperate so well with the coffee taste (as I was told). Of course I tried half a muffin so I can one more time say that there won't be a deep friendship between the coffee and me. But the chocolate chips were good.
At least my mom loved every single muffin and if this is possible she bonded even more with the coffee.


Cappuccino Muffins
(Makes 12 medium sized muffins)

Ingredients:

Muffins
2 cups flour (190g)
2 tablespoons baking powder
3/4 cup caster sugar (170g)
1 teaspoon of vanilla extract
1 cup milk (240g)
2 tablespoons instant coffee powder
1/2 cup butter (110g)
1 egg
1/2 cup semi sweet chocolate chips (100g)

Cappuccino Topping

6-8 oz mascarpone cheese (230g)
1 tablespoon caster sugar
½ teaspoon vanilla extract
½ teaspoon instant coffee powder
¼ cup hazelnut brittle (50g)

Directions:

Preheat the oven onto 375º F / 180ºC.
Melt the butter in a small saucepan and leave to cool. In a large mixing bowl, combine flour, baking powder and sugar.
Crack the egg into a medium sized bowl and add the milk and coffee granules and stir until the coffee is dissolved. Pour this coffee mixture onto the flour/sugar and add the melted butter.
Stir until just combined. Fold in the chocolate chips. Fill the muffin cases with the mixture, do not over-fill, about 2/3 full.
Bake for 15-20 minutes, until springy to the touch. Cool in the tin for about 5 minutes before putting the muffins onto a wire rack to cool.
For the topping: In a medium bowl, mix the mascarpone cheese, vanilla sugar and coffee powder together until blended. I just use a spoon to mix.
Spread onto muffins and sprinkle with the brittle.

Adapted from Cherrapeno


Wednesday, September 18, 2013

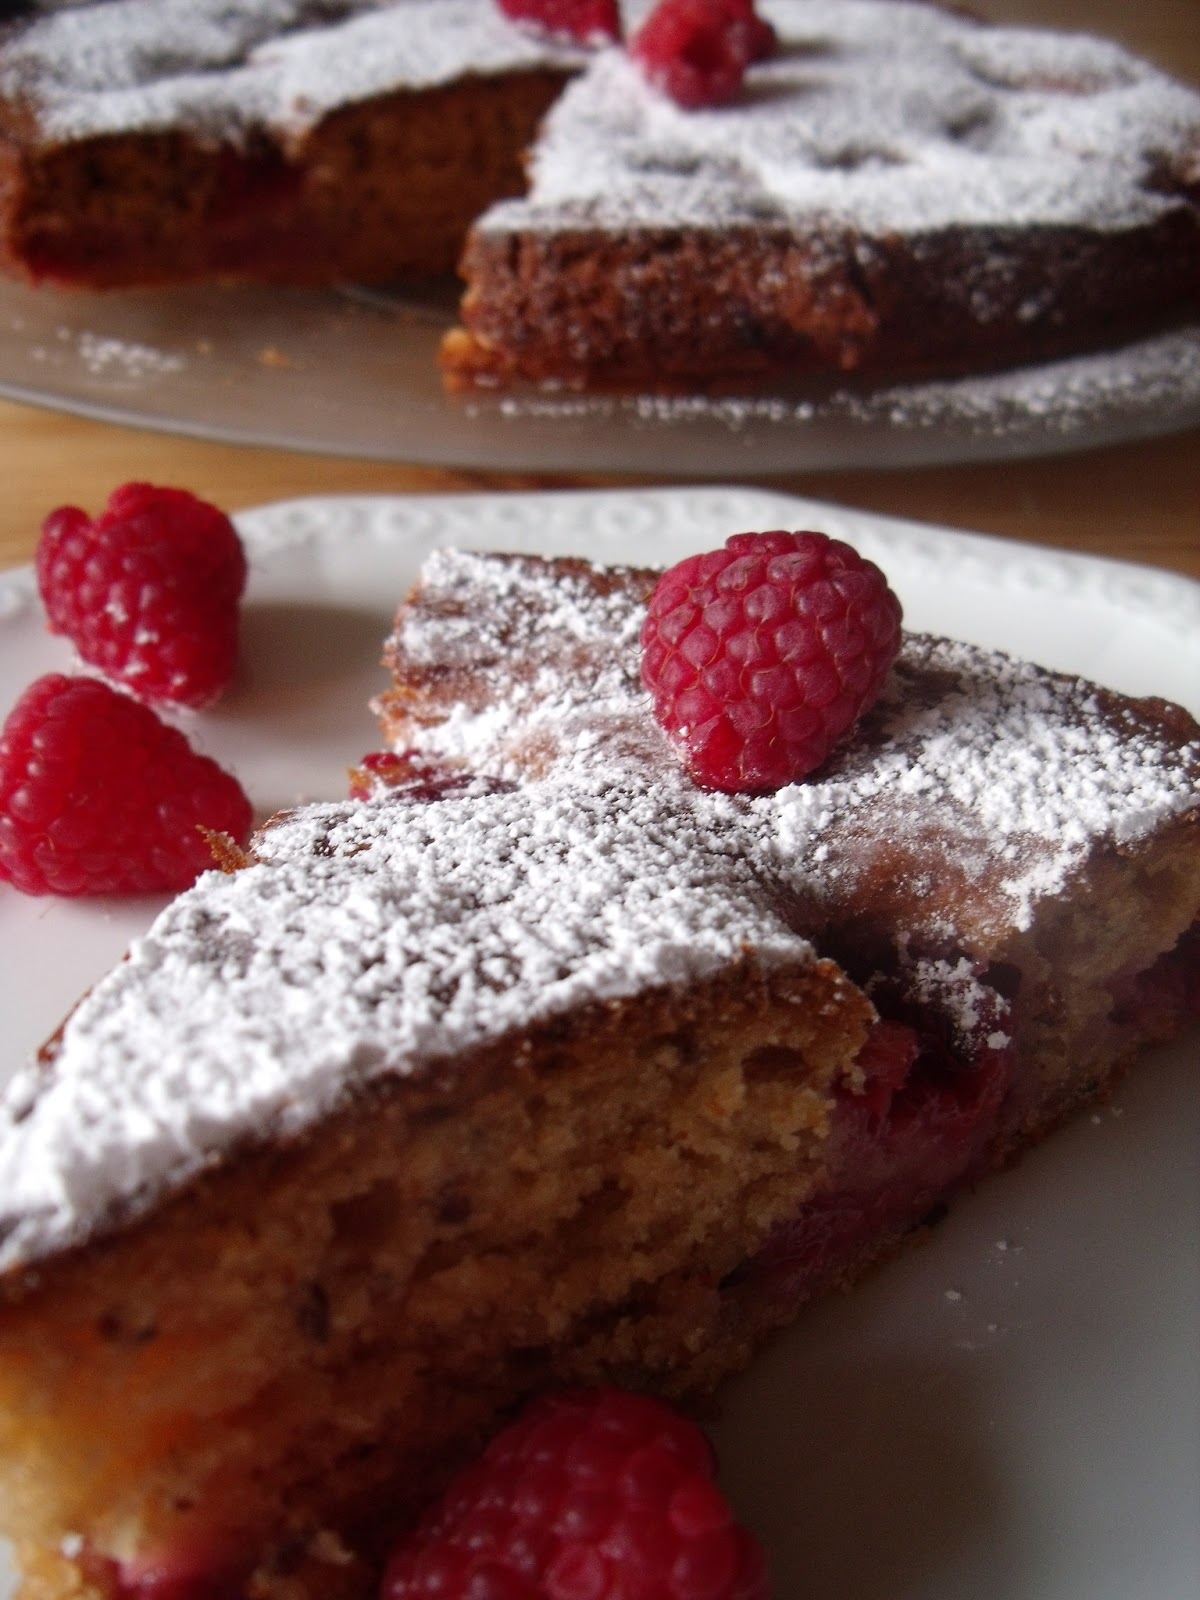
Raspberry Vanilla Coffee Cake


I love Coffee Cakes. They are so deliciously, crumbly and yet so easy to make. In my opinion you can eat Coffee Cakes every time of the day. It's not too sweet for breakfast (maybe I am the only person with this thought). As a dessert for lunch and dinner not too heavy. And of course for coffee - and - cake - time is this cake simply created for.
As a Coffee Cake lover I can't just bake a plain Coffee Cake  every time I feel like eating one. Then I start thinking about the perfect recipe. But I have to admit I am really lazy sometimes and don't want to be too creative in the kitchen. That doesn't mean the decorating and picture taking part. Just the thinking one. There is always so much to think of and the hardest point in life: decision making. Everything you do involves a decision, have you ever thought of that?


Anyways, enough about decisions, although there was the one of picking a recipe today...
But I managed this task in my life :)
And this cake even is a perfect breakfast treat. It has this super moist texture and is definitely not too sweet for a comfy weekend breakfast.

Raspberry Vanilla Coffee Cake
(makes 10 slices)

Ingredients:


1 cup milk of choice (240g)
1/2 cup vanilla-flavored yogurt (such as Wholesoy or Silk) (115g)
1 tbsp ground flax (5g)
1 1/2 tsp pure vanilla extract (6g)
3 tbsp coconut or veg oil (30g)
2 cups spelt flour, all-purpose, or Bob’s gf (250g)
2/3 cups xylitol or sugar (or sucanat) (130g)
4 tsp baking powder
1 tsp salt
1 tsp cinnamon
1/16 tsp pure stevia, or 2 extra tbsp sugar (or 2 NuNaturals packets)
1 2/3 cups raspberries (230g)
1/3 cup more raspberries (50g)
optional: chocolate chips

Directions:

Preheat oven to 350 F, and grease a 9 1/2-in spring-form pan. Combine first 5 ingredients and whisk. Set aside.
In a separate, large measuring bowl, combine all remaining ingredients except the final 1/3 cup raspberries, and stir well.
Pour wet into dry and stir until evenly combined (don’t overmix).
Pour into the prepared pan, then sprinkle the remaining berries on top.
Bake 1 hour, or until a toothpick inserted in the center comes out relatively clean.
Cool the raspberry coffee cake in the pan on a wire rack, 15 minutes, then remove the sides of the pan.
Adapted from chocolate-covered Katie